Friday, March 23, 2012

Rec Room Progress: Bidness in the Bathroom

In keeping with trying to make up for slacking on rec room updates, here's a post about finishing the bathroom.

You last saw the bathroom (in this post) with finished tile and paint, but that was it.


Since then, the toilet's been installed...


...along with the toilet paper holder (we re-used the same one from before the makeover),


And the sink and faucet:


Ohhhhh, but let me tell you about this sink and faucet. Looks ok in photo above, right?

Well check it from the side yo:


UGH! Attack of the killer pipes!!!!

We'd chosen this wall sink specifically because of its size. See, since the room is a small space (just enough to do your bidness, wash your hands, check your hair in the mirror, and be done) the sink couldn't exceed certain measurements - depth being the biggest concern. We searched high and low for a sink that fit our needs, but every pedestal sink and small vanity sinks were too large. We found this one in a catalogue at a local place called Fagers and its size was PERFECTO! So we ordered it and immediately hated it after installing it :(

Everything from the exposed piping to its rickity mounting (it didn't even come with proper mounting hardware - our poor plumber had to rig something best he could) was all wrong. WOP-WOP.... :(

So we formulated a Plan B:
    -We returned the sink & faucet and got our money back. The sink was $245 - waaaay overpriced to begin with and the faucet from Home Depot was $65.
    -Then we followed a tutorial I'd found on Young House Love. Yes, I copy them often...what can I say - they're brilliant at stylish and affordable DIY!  :)

Here's what we copied. Check out numbers 3 and 4 in their inspiration collage below:

(pic from here)

That's right. They used a nightstand and vessel sink to make their own custom vanity in their bathroom:


(pics from here)

First we started out by finding a base that would work for us in our space. We trotted out to Goodwill and found this beauty. In its former life it was a sewing machine table, but in its current life it became our perfect vanity:


I like her legs :)...And get this, she only cost $10.

(sorry for the blurry phone pic)

We roughed up the finish with our electric sander:


And then we stained it a new color, my favorite, Minwax's Jacobean:


For the sink and faucet, we found those online. We came across a sink on Amazon that fit our dimensions to a T. Length didn't so much matter but it needed to be precisely 12" or less in depth.  This guy is 19.44" long, 5" tall, and most importantly for our purposes of the project, 11.84" deep. Plus it was only priced around $100 so we ordered it pronto:


Funny thing is, this is the exact sink YHL used in their project, but I didn't know it until I checked their post to see how they mounted the sink to the vanity, haha! So I guess we really did follow their tutorial EXACTLY, haha.

We got ours with the oil-rubbed bronze drain stop though (see it there on the bottom, right?):


We found the faucet on Ebay for $40 and its measurements were exactly what we needed to work with the sink:


Now, before I show you the finished product, first we did something we forgot to document with photos: we cut the base in half. See, we didn't need the vanity to be as deep as it was, so we sawed off the back half, then drilled the holes for the drain and faucet, and mounted its slimmer, sleeker self to the wall.

Here she is, all set up and ready for washing one's hands :)


See how it hides the plumbing pefectly now?


And our faucet placement allowed for more room depth-wise by mounting it in the back right corner:


So that's the finished sink setup...Best part? Aside from it looking much better and being sturdier than the original sink configuration it cost us SOOOOOO much less to DIY our own vessel sink. Check it:

-Original sink and faucet total cost: $310
-New, DIY'd vessel sink, faucet and stand total cost: $150

We did it for less than half the price peeps! I luv me some money back in my pocket!! :)


Here's what we did above the sink to finish off the powder room:


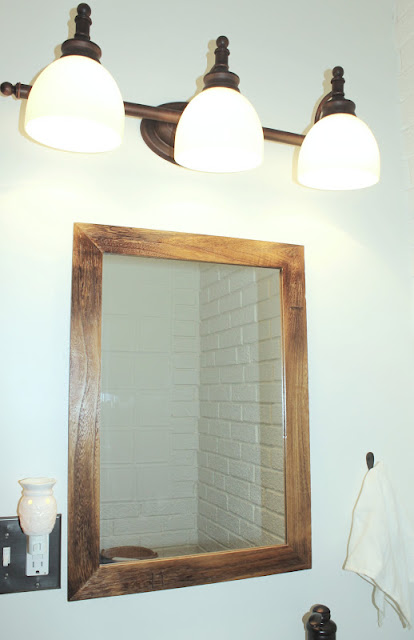
We reused the same mirror from before the overhaul (as well as the hook for a hand towel), and popped in a new 3-light, oil-rubbed bronze sconce (from Lowe's) with white glass shades that compliment the white ceramic sink.

Here's a pic with those lights flipped on. Ahhhhh...


And a pretty close-up:


I'd still like to hang some artwork or a shelf on the wall over the toilet, but aside from that minor detail, I'm calling it...this phase of the rec room makeover is DONE!

Yeah. That feels good to say :)


Seacrest out.

Tuesday, March 13, 2012

Rec Room Progress: Carpet and Desk Project

Boy oh boy, have I been slackin on rec room udpate posts! Ever since the baby took over my brain (and therefore the focus of my DIYing and blogging) I've neglected to keep you informed of this very important room's progress - my apologies! :)

Well slack no more (which is also what my pants said now that they're fully filled with nuthin but belly, haha) cuz here we go! The last picture you saw of our rec room was this one, in its horrid, incomplete state:


Only the ceiling had been painted and the walls were unfinished. The tile was in at the entryway (behind me from where the above photo was taken) but there was no carpet on the floor. Here's a wide shot where you can see the nasty concrete floor:


Well my dears, you're in for a real treat cuz this room did a total 180 once we painted the walls (Dover White by Sherwin Williams), installed and painted the trim, and had Lowe's install the carpet. We're in LOVE!!!! And best of all, Winston approves :) It's the only carpeted room in the house and he loves to sprawl out on the floor and naw on his bone til his little heart's content.

VOILA:


So, not one to sit on my laurels, I got to brainstorming how we'd set up the desk area in this small but multi-functional space (remember, there's a half bath and laundry behind the double doors on the right side of the room) since it also has to function as an office area.

See that desk and chair at the bottom, left corner of the photo above? That's an IKEA table and 4-chair set we bought from friends when hubs and I first moved in together and it served as our kitchen table. But most recently, in this house's room it was our desk. Problem is, it stuck out too far into this narrow room and didn't provide enough of a work surface or concealed storage for papers, CDs, and other desk supplies, so we decided to craigslist it.

We wanted to keep our old filing cabinet (in the corner of the room in the above photo) and somehow incorporate that into a new desk setup. Then my thoughts turned to what John and Sherry did over on YHL to create their office desk space:

YHL pic from here


They found second hand nightstands to use as their base storage and then created a desktop out of wood planks for a nice wall-to-wall built-in look.

We didn't need two spots for chairs like John and Sherry did, but their general setup was something I could duplicate for our space. I checked out craigslist for cabinets and nightstands that would work for us, but no luck. They either weren't a good price, or were too deep - we needed something shallow and streamlined to make the best use of our long and narrow room.

Then I stumbled upon these at Michael's one day during a week they were 40% off:


They're 14.5 inch cubes you can stack and customize to any configuration you want. There are cubes with shelves,  1, 2 and 4 drawer options, filing cubes, etc. And at 14.5 inches deep, they're a PERFECT fit for our space.

Mike and I decided they were a great solution for us and we purchased 6 cubes for about the same amount of cash we got from craigslisting the old desk - I love a good swap! :) Here's the left side with 4 cubes mostly assembled and stacked:


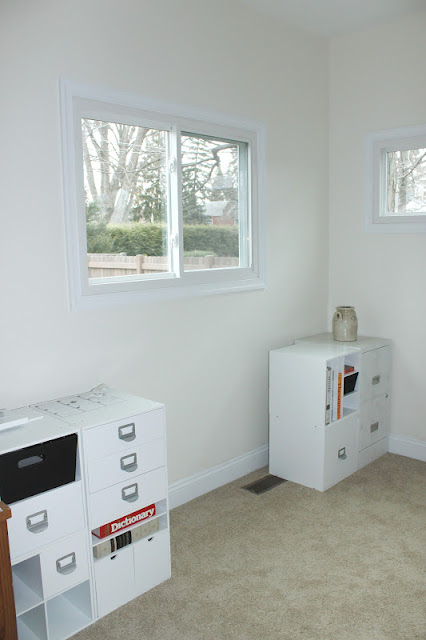
And here's a wider view where you can also see the right side with two cubes assembled and stacked next to our original filing cabinet we were able to retro-fit into the setup:


We centered the opening for the desk chair under the window (I used a chair from our old desk set to illustrate):


And here are two photos taken from the other side of the room:


The filing cabinet had a crude spraypaint job, which we later freshened and brightened up with white paint to match the other cubes (I'll share those pics in a later post).


We also secured the cubes together with brackets and screws so that they are each one unified base, which made them sturdier as well.

Next came time for a desk top! We took our measurements and trotted out to Lowe's to see if they had anything that would work. Guess what, THEY DID! :)


It's a  3/4", 20" x 96" solid wood panel that fit our measurements perfectly! Like couldn't have worked out any better perfectly! We didn't need to cut it down at all since it's the exact length we had the bases spaced apart and it left just the right amount of overhang at the front and back of the desk.

Plus it was only about 30 bucks after we used a Lowe's 10% off coupon :)


Another good thing? It was pre-sanded so all we had to do was break out the stain (which we already had in the basement from previous projects).


The finish is called Jacobean and it's a nice, dark and rich color:


After the stain had the proper time to dry, we did several topcoats of acrylic in a satin finish to protect the wood and give it a gorgeous gleam. But those are pics I'll share another day, along with the finished product of the desk top and bases assembled.

OOO! and we also solved a window treatment dilemma we were having (four windows could = a pretty penny in window dressings), but we bucked having to shell out crazy dough with a simple fix I'll share later.

Toodles til then! And if you're on the east coast like moi, I hope you're enjoying the awesomest March weather ever!! :)


Wednesday, March 7, 2012

Heart of Life

I'm of the belief that some posts don't need words. A picture and its title can say it all...


Happy Wednesday folks! :)

Monday, March 5, 2012

Thinkin Spring

Well, it's March folks, and that means a couple of things:

1- only 12 more weeks til we get to meet our little man! (WOOOHOOOO!)
2- only 2 more weeks til the first day of Spring.
3- and only 1 more week til Daylight Savings time and we get longer, brighter days - YAAAAAAAAAY for daylight!

So cabin fever has officially kicked in and I'm ready for all things spring!! We've had a pretty mild winter which makes me feel like spring is already here...so I'm going with it :)

I put together some green and white decor (my fav color scheme for the start of spring) and - said in a heavy Irish accent - some St. Patty's day flair to give our heritage a nod, to boot :)


Hanging in our living room is this old window I painted white and sprayed the glass panes in chalkboard paint. I gave it a St. Patty's day spin:


I stuck some faux green and white flowers in the vases I keep on either side of the TV. The right side has a blue glass Ball jar and ceramic birdie:


(We still have to hide the TV cable with a cord cover)

And the left side has the same, but with a ceramic No. 7 - my lucky number and the month and year of our first date :)


On my last run to the grocery store I was looking for some white tulips...no luck. But I did find these purdy white lillies.


I brought em home, stuck em in a white pitcher I had, and put them on the dining room table...


...and then I had a photo shoot with them :)


Okay, okay. Sorry. I got carried away :) I just loooooove me a bouquet of fresh flowers and the good mood they always put me in.

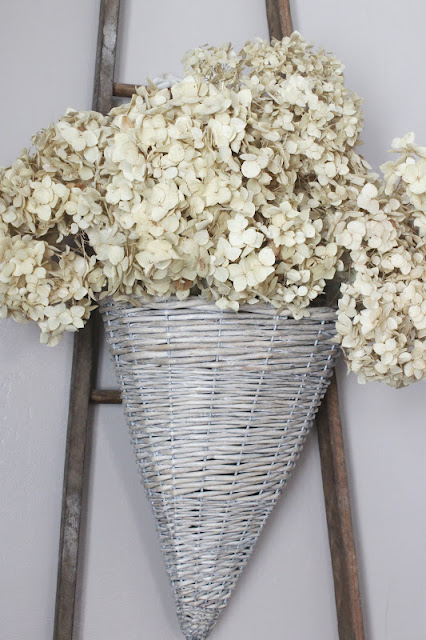
Also in the dining room are some dried hydrangeas I've had hanging since last spring:


I never took em down cuz I like em so much :)


On our dining room hutch I put all my blue glass Ball jars in a row across the front:


These were my grandmothers and we used them as vases for center pieces at our wedding :)


Some faux green apples are displayed in a large glass jar in the kitchen, and with the flour jar sitting next to them, I just realized I accidentally created another green and white spring combo - yay for happy accidents! :)


I penned another St. Patty's Day message on our kitchen's chalkboard door.  And just now I had an "oh no!" moment when I looked up the spelling and realized I spelled Leprechaun wrong :(


I forgot the 'u'...oops!


Anywho, also in the kitchen there's a shelf where I have a few things displayed:


I found these cute numbered containers at Christmas Tree Shops a year or so ago. They display our house number (but obviously they've been edited so it doesn't show our real address) and I stuck some little white berry twigs inside each.


And last but not least, a little green birdie is perched atop a rattan storage basked in our finished (FINISHED!) rec room, of which I've taken some pics and will show you soon!! :)


As the season fully comes around I'll probably break out my faux forsythia branches and run with some yellows and other fun bright colors (maybe at Easter!) that always boost my mood.

Anyone else already fully committed to the season? I can't be the only one :)

Linking up here!

The Lettered Cottage
Related Posts Plugin for WordPress, Blogger...