WOOOOO HOOOOOO! - halfway there!
To mark the occasion I snapped my first real 'bump' pic the other day! :)
Since finding out we were pregnant, Mike and I have been taking pics at each month mark to document my growing belly :) I'm so happy to be finally showing this month.
Here are pics from each month, along with a little announcement attached :) ..............................
......................................
.............................
.........................................................
...........................
We found out at Christmas that we're having a boy and we couldn't be happier! :) Now if only we could just narrow down our name list :/ haha. We like so many it's hard to choose!
Now that we know what we're having I'm so excited to add some boy touches to our nursery's neutral palate. I've always loved animals and wanted to do a zoo/jungle animal theme with elephants and giraffes and alligators and hippos, oh my! :)
Then I found the perfect inspiration fabric for curtains (at JoAnn's), and it was just the launching pad I needed to run with my ideas:
Polka Dots! in blues, gray, and greens. As you can see in the photo above I also picked up some yarn in corresponding colors for a project that'll go on the wall above the crib - pics of that and the crib and dresser to come!
But first I want to show you the toybox project we just completed. This is an old chest that used to be my grandparent's:
I remember all the fun my sisters and cousins and I had playing with all the toys this chest used to hold...old Barbies, stuffed animals and dolls, wooden games and squeaky toys...what fun memories :)
It used to be covered in a reddish brown paint and when I acquired it about 3 years ago, I stripped it down to its original wood. At the time, I didn't know if I wanted to stain it or paint it a different color, so I just left it as it was.
Now that we're planning to use it in the baby's room for toys and extra storage, this inspiration pic I found on the web gave me a fun idea:
But instead of doing chalk board paint all over, I wanted to do a scaled down little area for magnets and chalk drawings.
So to start, I wanted it raised off the floor a tad. I bought four legs (feet?) from Lowe's, painted them white, and attached them to the bottom. They're a little too high for my liking, so not sure if they're staying or if I'll cut them down an inch or so.
Here's what's sitting on the toy box in the pic above:
It's the same magnetic and chalk board paint I used on our kitchen message board project.
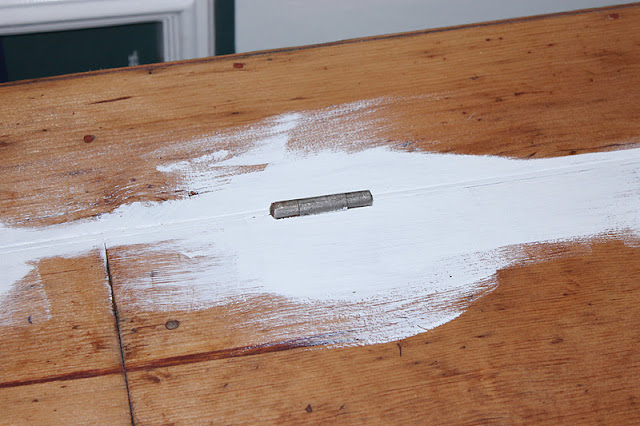
I sat those aside for a minute and began painting the chest white:
First I used a brush for all the angles and detail work like around the hinges since I didn't want to take them off:
Then I used a small foam roller for the rest of the piece:
Here's an action shot Mike snapped after I'd applied the first coat of magnetic paint:
And here's a shot after the chalkboard coat was done. Notice the black paint on my neck...apparently it was a messy job :)
Mike measured and cut the trim we used to frame out the magnetic/chalkboard rectangle. It was pre-primed so he began painting it ahead of time to cut out having to paint it after it was applied to the front of the chest.
Once everything was dry, our next step was to add the trim. We used a level to make sure everything was straight, then used painters tape to keep the pieces in place while we tapped a few finishing nails into each.
You can see an oops piece we had to add when we goofed on the length of the bottom trim piece. No biggie - you won't even notice it once we add caulk, sand it, and do paint touch-ups in that spot and over the rest of the nail holes.
But before adding those finishing touches, I was itchin to test it out first and start drawing with my chalk! :)
Please excuse my dusty floor underneath. It has since been swiffered since looking at these photos ;)
I also tested out its magnetic power with some magnets from our fridge and it works! So I'd like to find a magnetic plastic alphabet and/or numbers set to add to the fun :)
Next up was to make the curtains with the fabric I'd bought.
I don't know how to use my sewing machine (I've tried, believe me, oh how I've tried!) so I made my hems with Heat-n-Bond that I bought (also at JoAnn's) and ironed on.
Here's the first side finished:
And both sides done. Not bad for the first curtains I've ever made, eh? (well, curtains that weren't drop cloths anyway..those come pre-hemmed) :)
Oh, and I did the curtains before we added the trim to the toy box. There was a lot of waiting for dry times in between coats so I made myself useful and completed the curtains awhile :)
I love how from a distance the dots aren't too distracting, but up close they're so vibrant and interesting.
Oh yeah, and see that cute little giraffe in this photo from further up?
Well he got a bit of a makeover with some paint as well - and he happens to be holding the first blue outfit I bought ;)
Can't wait to so you the new color he's sporting now! I'll snap some pics and show you soon.
Til then, Happy Wednesday!


Lookin good :)
ReplyDelete