 Our kitchen is pretty small, but was in need of a message center that wouldn't clutter up the fridge.
Enter this door:

It's the door that leads to our basement, and it's directly oposite from the kitchen stove, on the other side of the island. I decided to deck it out in magnetic paint (so it could hold papers with little magnets) under a coat of chalkboard paint.
I wasn't sure if it'd make the already-small kitchen feel smaller, but then I thought, "hey, if it's hideous, I can paint right back over it in semi-gloss white" :)
So hubby helped me take it off the hinges and bring it outside. I taped and papered up the perimeter of the door along the perimeter of the inset and sanded it down:

I bought this can of Krylon magnetic paint in a spray can...

...and got this far before the can crapped out, not even 1/4 of the way used:

I thought, oh well, maybe it was a fluke. So I went back to the store, exchanged that can for another can, came back and tried again...still this:
I'm not sure what the issue was, but the can would start to spray, then sputter out. I'd let it sit, then it would spray a little again, then quit again. The nozzle wasn't clogged and I followed the directions to a T.
Maybe it was a pressure issue with the can. Maybe the paint was bad (who knows how long the cans had sat on the stores shelves), but I returned the can, and instead of spray, went with a quart of Rust-oleum magnetic paint:

I would've bought it in this form from the get-go, but the store I was at only had the spray cans. I was too lazy to drive another 30 minutes to go to another store at the time :)
My husband needed grass seed so he ended up getting it while at the other store. Thank goodness for non-lazy husbands :)
While there, he also picked up this:
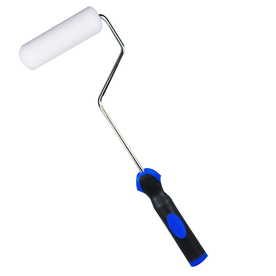 |
| photo from here |
It's a foam roller kit specially for doors and cabinets. It creates a smooth finish so there are no brush stroke marks.
I didn't have a paint tray, but I improvised with a plastic storage container wrapped in aluminum foil :)

After three thin and even coats, (with a half-hour of dry time like the directions called for) it looked like this:

Close up, you can see that I didn't bother getting it flush up to the tape. I don't plan on putting any magnets along the boarder of the door. I just wanted to make sure I had the interior thoroughly covered:

I let it dry 4 hours (the directions recommend letting it dry 4 hours before doing a top coat of paint of your choosing) and then I did a coat of Rust-oleum chalkboard paint:
 |
| photo from here |

...and all the way done. GLORIOUS chalkboardness! Which IS a word now :)

I only did one coat of the chalboard paint because A- it covered extremely well, and B- I was worried another coat might reduce the strength of the magnetic paint (even though the directions said it may only lose magnetic power after more than two top coats).
I didn't want to risk it. Hi, my name is Amy No-Risk-Taker Storm :)
Once dry, we brought it back in, took off the tape and paper, and re-hung it in the hinges.
She looks grrrrrrrreat! :)

It's the perfect place to jot down our grocery items as we think of them.
And the magnet works! There's already piece of mail hung that we need to come back to later to take care of:

And it's stayed put. It's in the same place since completing the project 4 days ago (I was worried abuot the magnets sliding down the door if something was too heavy for it to hold).

One thing I will note though, is that it only holds up these kinds of magnets. I tried two different kinds of clip magnets and they were a no-go :/ Just slid down the door. But the kind in the photos above work just fine.
Since taking these photos, hubs has already jotted a note about scheduling for an upcoming wedding we're attending. If he's using it, it's DEF. functional....AND fun! :)
Love it!

So what do ya think? I think it works great but worry it could get a little cluttered looking...We'll have to stay on top of that and let you know how it's functioning down the road.
I think what I'm most excited for is having a place for future kiddos to draw and letting them have their "art" displayed :)
How bout you? Anyone out there recently complete a similar project? I wanna hear about it!
OH! And this project got my wheels turning for ANOTHER chalkboard paint project when I saw this inspiration photo:

(wish I could remember the source of this pic but can't) :(
I have an old toy chest from my grandparent's house that could use a makeover and this could be the ticket! Oh chalkboard paint, how I love thee! :)
Have a great day!
No comments:
Post a Comment