Wednesday, April 20, 2011

Desk Turned Dining Table

First I'd like to start off with a big 'THANK YOU!' to my readers who left such lovely words of affirmation on my last post about turning the sunroom into an open porch. It was a great confidence and motivation booster - more than you know! :) Thanks again!

In in my last post about the back porch I mentioned wanting to make the "new" space an area to relax, dine and entertain. We had the 'relax' part covered since I'd snagged two Teak rocking chairs from Christmas Tree Shops (anyone else LOVE that store?!).

So as for the dining and entertaining aspect of the porch, this sad, plastic table and chair set seen in the middle of our yard here just wasn't cutting it on our porch. It's from my single, apartment-renting days when that's all that fit on my apartment's small patio.


Enter Craigslist :)  I found a desk listed for sale on CL and went to check it out. It had all the lines I wanted (very farm table style) but the top was a formica/particle board type product and the entire thing was grey/blue.

(This is where one would normally insert a before picture of said desk, but as you probably know, I was too excited to get started working on the thing and forgot to snap one)
:)

The seller was asking $40 but I talked him down to $20 since I new I'd have more costs incurred revamping the thing. He agreed on $20 and my new patio table came home with me! :)

Once I had the table home I was brainstorming ideas and had a moment of brilliance (those don't happen very often)  :) I thought, "lemme see if I can remove the top and replace it with boards from the hardware store, then paint it a different color." And that's exactly what I did. The top was secured with screws in each of the table's four corners, so I unscrewed them and painted the body in black exterior paint that I happened to get for free from last year's neighborhood yard sale - Love it!


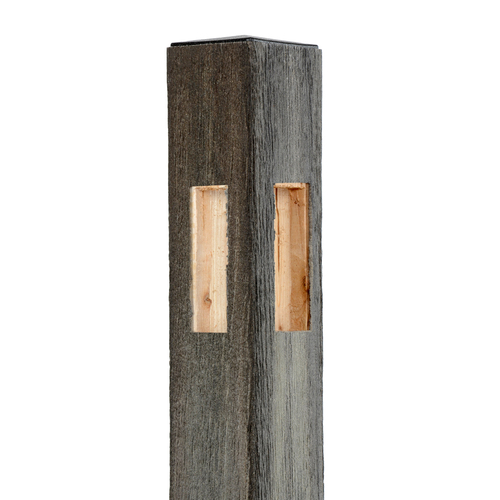
In the photo above you can see the underside of the top that's leaning against the porch post. That grey/blue color was what the whole piece used to look like.

I didn't sand the apron or legs of the table prior to painting because I knew this piece was old...like maybe 1950s old...like when they still used lead paint old. So to be safe I just painted right over top of everything. When all was said and done, I did lightly (and with a sanding mask) distress the edges with a sanding block to give it that time-worn look.


This photo shows where the drawer goes:
 

Aside from the top, which I'll show you momentarily, this is my FAVORITE part of the table.


Look at that beautiful, original hardware! SWOON! :)


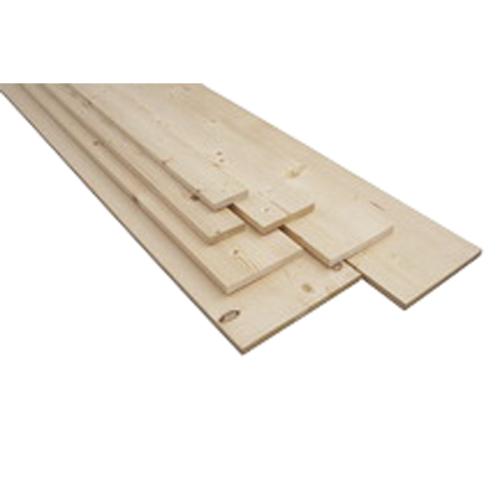
Okay, so here are the boards I picked up. I can't remember if it was at Lowe's or Home Depot anymore since I did this project last summer, but they're 1x12s, about 6 feet long. They were the PERFECT length! I didn't need to do ANY cutting - that's my kind of project :)

I bought three boards at 11 bucks a board for a total lumber cost of $33.

At this point my husband joined in the project - cuz he's smart and knew this was the fun part ;) - and once we glued and nailed them into the base, we scratched and dented up the boards using a hammer, screwdriver, and some nails for "wormholes" and stained it with some left-over stain we had in the basement.

VOILA!


(It's hard to see the scratches & dings in this photo but they're nicely highlighted after we added coats of polyurethane)


The next step we took was adding about 4 protective top coats of semi-gloss polyurethane we already had on hand. We allowed 3-4 hours dry time between each coat.

Sorry I don't have a finished product photo after the polyurethane step. I'll have to remember to take one and post it later. But I'll end on this note: Our total cost for this project including the table and lumber was only $53

Awesomeness :)

~Amy

Monday, April 11, 2011

Sun(less)room Turned Porch!

After we put in our fence, the next project on our DIY list was to revamp this walled-in sunroom. For being a 'sunroom' it hardly let any sunlight in at all, as well as hardly any fresh air so in the summer it was absolutely stifling.


So hubby and I set out to make it a porch instead. We took off the glass shades and screens, and then ripped off the aluminum doors and paneling. Here's everything we took off, in a big pile ready to be recycled:


We took it all to a local metal recycling place and were surprised at the cash amount we received for the aluminu. We're glad we did that (for both our planet and our wallet), as opposed to just chucking it. See, recycling pays - litterally! :)

And here's the result of the demo:


Much more open and inviting! :)

Mike had been working out in this space (see his weight bench set?) So he moved it to the basement and set up his workout space there.

Here's the before and after, one more time:


The next thing on our list was to make this porch a place to eat, entertain and relax outside. More on that to come later, but here's a sneak peak...


Happy Monday!
~Amy

Wednesday, April 6, 2011

Taking Back our Back Yard - Weds. Edition

Good Wednesday morning all! It's Day 3 of this week's themed posts about our home's back yard.

Today you get to see the Before and After total transformation of how we went from this:


To this! :)


If you're just joining us, Monday I showed you how this time last year we cleared the yard of forsythia bushes, lilac trees, and a gate to nowhere. Tuesday I showed you how we took down a crumbling wood fence and dismantled an old shed with a little 4 wheel drive action :)

Also yesterday I left you with this sneak peak of a photo of our fencing:


So here's how Project Build a Fence went. First decided on the type of fencing we wanted. With a 100lb. Weimaraner who likes to put his paws up on things, we knew we needed a 6' privacy-style fence.


As for deciding on fencing product, we chose composite (a wood and plastic mixture) because 1- we didn't want the required maintenence that comes with an all wood fence, 2- metal fencing was out of the question due to its cost, 3-we didn't care for white or beige (really the only color choices) vinyl that over time can turn green or show dirt, plus we heard vinyl fencing can split or crack easily like if the lawnmower were to spit a rock out a rock at it, and 4- we wanted something more aesthetically pleasing than chain link fencing.

So we went with the Woodshades Brand of composite fencing from Lowes in the Dog-ear style and Barnwood color:

(Panel image found here)


Composite has the rich look of wood with low maintenance, it won't rot, split or crack. Plus it has a 20 year limited warranty. Sold :)

Based on the dimensions of our yard, we calculated how many panels, posts, cement bags, and gates kits (we put in two - one in the back leading to the park, and one at the side of the house leading to and from the back yard) we needed and placed our order.

Then when it all arrived we rented a 2-man auger from a local machinery-for-rent kind of place that we used to drill our post holes. It looked like this:

(Photo from here)

 
Then we measured according to the width of the panels (6ft wide) and marked each spot where we used the auger to drill our holes (about 3 feet deep). The auger-drilled holes are shown the photo below (except that in this photo our holes weren't spaced exactly 6' apart because we were ending at the side of the house and needed less than that to finish out the row).


If you've never used an auger before, here's a tip my husband would give you: Prepare to be sore :) If I had taken a video of the hole-drilling process, here's what it would've looked like:


Do you see all the work they did just for that one hole? My husband and our neighbors Dave and Mike did that for more than 40 post holes. 40 HOLES! ouch. I'm thankful we had the guys helping because there's no way I would've been able to do that. My only responsibility with the auger was pulling the engine's start cord (just like on a lawnmower) while the guys stood braced for the spinning action of the giant drill bit.

After all the holes were dug we started with setting the first post in concrete in the back left corner of the yard. Then we slowly worked our way outward in a reverse 'V' fashion doing a panel and post on the back line, then a panel and post on the left line, and so on, like so:


Each panel has 3 horizontal planks that are exposed at the ends (you can see them in the panel photo 5 pics above) and those fit right into the post holes shown in the example below:


(photo from lowes.com, found here)


Here's a shot of the back line completed up to the gate:


(You can see that there's much more space under the fence closer to the the gate than there is at the starting left corner. That's because there's a slight negative grade in the slope of our yard from left to right. We solved this issue by bringing in a load of dirt fill and shoveled it under and around the gap.)

And here are shots of the left side done from the back corner up to the front gate:


As we went along, we used 2x4s at strategic posts (as seen in the above and below photos) to serve as extra support while the concrete set in the post holes.


Here's a shot of ours and our neighbor's front gate kits assembled and installed:

(Ours is on the right and our neighbor's is on the left. That weird discoloring was just from that panel being wet, once it dried it wasn't noticeable.)

Here's a wide shot of the back and left sides done:


And below is the right side before we put any posts and panels in:

You can see the all the holes we dug and if you look close enough, you'll see the white string line our neighbor Mike set up. Mike's a contractor and is very knowledgable about fence building. The line is there (tethered to a stake in the ground, from the back corner to the front) as a guide so when we set our posts they were all touching the line making a straight and level row of finished fencing. Of course we also used a level to double check that everything was straight and plumb.

Also in the photo above, can you see all those rocks piled in front of the gate? Those were some doozies we came across while augering. Every time the drill bit hit one, it was not a fun time digging it out :/

BUT as you'll see in the completed fence photo below we put all those rocks to good use:


We used them around our fire pit! It worked great. And as you can see, Winston loves running around at hyperspeed in his new back yard :) And after all our hard work, we sure love it too!


Let's have one more look at the before and after.

Before:


After:


Thanks for coming along on this trip down memory lane. It was a fun ride :)

If you stay tuned, later I'll show you what me and hubs did with this sunroom portion of our back porch.


Anyone else take on a backyard, DIY fencing project? Let's commiserate! :)

Linking up to Thrifty Decor Chick's Before and After Party!

beforeAndAfterButton

Have a good day!
~Amy

Tuesday, April 5, 2011

Taking Back Our Back Yard...Part two

Happy Tuesday all! This week I'm showing you the process hubby and I went through this very time last year to revamp our back yard. Yesterday I showed you the laborious task we had of tearing out a line of forsythia bushes, lilacs and an old gate-to-nowhere here.

Today I'll show you what we did to this side of the yard:


First things first, we went to town dismantling the dilapidated fence. I wish I had taken pictures, but we were SO excited to start this project that I didn't get my camera til it came time to remove the rotting shed.

Let's just say the fence was so easy to tear down a toddler could do it - not that I would ever allow a toddler to rip a fence down - that's just how easy it was because of it's rundown condition and how poorly it had been assembled in the first place. I'm talkin a hammer and crowbar, and this thing was down in 20 minutes flat - no joke :)

Next up on the demolition agenda: This rotting wood shed that had become home to a few woodland creatures, namely squirrels and chipmunks.

Let me introduce you to a few characters here in the photo below:


The seemingly disembodied arm on the left belongs to none other than my honey, Mike.  The man in the middle is our neighbor from across the street who was the brains behind this operation (the demolition and fence installation), and is also named Mike. And the man on the left is our next-door neighbor, Dave ,who shares that fence line and also did a ton of work on the project.

The next few photos depict Neighbor Mike's idea for the shed demolition. Note the 2x4 leaning against the right front corner of the shed. Can you guess why that's there?


Why, so Neighbor Mike could use his truck as a wrecking ball of course! :)


If you look through the open door, can you see the difference in the gap between the shed and ground? It was working!


This moment was too exciting to pass up so I took a little video of it on my camera.

**DISCLAIMER** At around 12 seconds in, my husband drops the "S" bomb referring to the squirrels who used to live in this shed and what they might've just done in their little squirrel pants after the truck came through :) So if there are any little ones around you've been warned ;)

Also of note, I foolishly thought there WAS no sound when my camera records so I make some stupid comment about that in reference to Mike's "bad" word. Then the rest of the video is pretty unexciting. But watch anyway if want, haha:


So Neighbor Mike rammed it with his truck one or two more times and then...


Went medieval on the thing, haha! He started tearing off the doors...


Which my honey then loaded into the truck for disposal...


Then when it looked like this:


The three men mustered up every ounce of true grit and manly power possible and pushed it over!


Okay, it wasn't that difficult, but look at them - they sure were proud of the job they did :) awwww, haha.

Then, off came the sides:


And it was at this point I put the camera down and decided I should probably help. Plus, it looked like the guys were enjoying the demo and I wasn't about to miss out on that kind of fun. And guess what - it WAS fun. Hands down, demo is the best part of any project...well, besides the finished product, of course!

Here are Dave's daughter's who came out to show their support and stood proudly on the spot where the shed once stood:


Aren't they so cute?!

Next up was ripping out that platform (it was so close to the house and there were signs of termites - that was NO good):


And by late morning/early afternoon, that side of the yard looked like this:


The shed's platform (front pile) was cut into thirds for easier hauling and disposal, and that huge pile in the back was the remains of the shed and fence. Ahhhh...THAT is the feeling of accomplishment and a great day's work :)

We took all the debris to our township's waste management and recycling center where they sort everything from construction materials (which was the category for our haul) to yard waste (which is where we took all the forsythia trimmings discussed in yesterday's post) where it's composted and turned into mulch that's free to all township residents - pretty cool, huh?

So to conclude, we eventually had a clear yard on all three sides and could FINALLY commence Operation Build a Fence - WOO TO THE HOO! :)  Here's a little sneak peak:

Check that out tomorrow yo! :)

~Amy
Related Posts Plugin for WordPress, Blogger...