You last saw the bathroom (in this post) with finished tile and paint, but that was it.
Since then, the toilet's been installed...
...along with the toilet paper holder (we re-used the same one from before the makeover),
And the sink and faucet:
Ohhhhh, but let me tell you about this sink and faucet. Looks ok in photo above, right?
Well check it from the side yo:
UGH! Attack of the killer pipes!!!!
We'd chosen this wall sink specifically because of its size. See, since the room is a small space (just enough to do your bidness, wash your hands, check your hair in the mirror, and be done) the sink couldn't exceed certain measurements - depth being the biggest concern. We searched high and low for a sink that fit our needs, but every pedestal sink and small vanity sinks were too large. We found this one in a catalogue at a local place called Fagers and its size was PERFECTO! So we ordered it and immediately hated it after installing it :(
Everything from the exposed piping to its rickity mounting (it didn't even come with proper mounting hardware - our poor plumber had to rig something best he could) was all wrong. WOP-WOP.... :(
So we formulated a Plan B:
-We returned the sink & faucet and got our money back. The sink was $245 - waaaay overpriced to begin with and the faucet from Home Depot was $65.
-Then we followed a tutorial I'd found on Young House Love. Yes, I copy them often...what can I say - they're brilliant at stylish and affordable DIY! :)
Here's what we copied. Check out numbers 3 and 4 in their inspiration collage below:
| (pic from here) |
That's right. They used a nightstand and vessel sink to make their own custom vanity in their bathroom:
(pics from here)
First we started out by finding a base that would work for us in our space. We trotted out to Goodwill and found this beauty. In its former life it was a sewing machine table, but in its current life it became our perfect vanity:
I like her legs :)...And get this, she only cost $10.
 |
| (sorry for the blurry phone pic) |
We roughed up the finish with our electric sander:
And then we stained it a new color, my favorite, Minwax's Jacobean:
For the sink and faucet, we found those online. We came across a sink on Amazon that fit our dimensions to a T. Length didn't so much matter but it needed to be precisely 12" or less in depth. This guy is 19.44" long, 5" tall, and most importantly for our purposes of the project, 11.84" deep. Plus it was only priced around $100 so we ordered it pronto:
Funny thing is, this is the exact sink YHL used in their project, but I didn't know it until I checked their post to see how they mounted the sink to the vanity, haha! So I guess we really did follow their tutorial EXACTLY, haha.
We got ours with the oil-rubbed bronze drain stop though (see it there on the bottom, right?):
We found the faucet on Ebay for $40 and its measurements were exactly what we needed to work with the sink:
Now, before I show you the finished product, first we did something we forgot to document with photos: we cut the base in half. See, we didn't need the vanity to be as deep as it was, so we sawed off the back half, then drilled the holes for the drain and faucet, and mounted its slimmer, sleeker self to the wall.
Here she is, all set up and ready for washing one's hands :)
See how it hides the plumbing pefectly now?
And our faucet placement allowed for more room depth-wise by mounting it in the back right corner:
So that's the finished sink setup...Best part? Aside from it looking much better and being sturdier than the original sink configuration it cost us SOOOOOO much less to DIY our own vessel sink. Check it:
-Original sink and faucet total cost: $310
-New, DIY'd vessel sink, faucet and stand total cost: $150
We did it for less than half the price peeps! I luv me some money back in my pocket!! :)
Here's what we did above the sink to finish off the powder room:
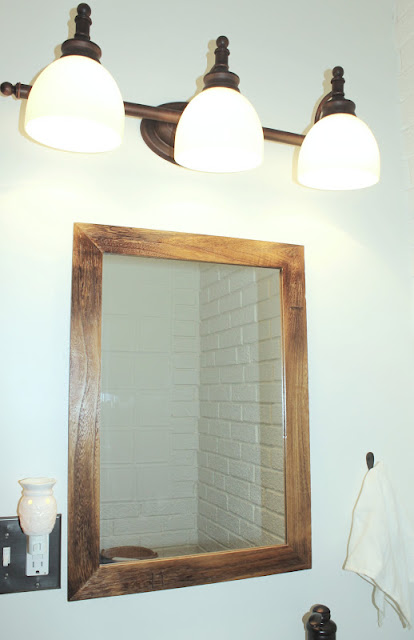
We reused the same mirror from before the overhaul (as well as the hook for a hand towel), and popped in a new 3-light, oil-rubbed bronze sconce (from Lowe's) with white glass shades that compliment the white ceramic sink.
Here's a pic with those lights flipped on. Ahhhhh...
And a pretty close-up:
I'd still like to hang some artwork or a shelf on the wall over the toilet, but aside from that minor detail, I'm calling it...this phase of the rec room makeover is DONE!
Yeah. That feels good to say :)
Seacrest out.


I love it, you guys are so crafty.
ReplyDelete